Unknown Facts About Tile Installation Contractors
Table of ContentsThe Of Tile ContractorThe Buzz on Tile ContractorsThe Buzz on Tile InstallationWhat Does Tile Installation Mean?What Does Tile Contractor Do?The Best Strategy To Use For Tile InstallerSome Known Questions About Tile Installation.
Preparing for Grouting Prepare your space for grouting by wiping any type of excess thinset eject and also in grout joints. An utility blade works the very best to clear out the cement joints. Make certain to exchange out your water bucket frequently, job with clean water and make use of a nearly dry sponge.If you have actually installed a man-made ceramic tile, such as glass, ceramic or porcelain, currently is a great time to use a cement launch. This avoids the cement from sticking excessively to the surface of the ceramic tiles. If you are using all-natural rock or encaustic cement tiles, we suggest additionally using a rock sealer before grouting.
Allow cement mix slake according to the manufacturer's referral, and briefly remix prior to application. Maintain open time and cure times in mind as you provided for the thinset step. Have a container of water and also a sponge on hand to tidy as you go. tile contractor. Start applying your cement with a grout float.
Get This Report about Tile Installation
Take care not to utilize also much water when cleansing up as it can leach the pigment out of the cement and also lighten the shade. Reduce the quantity of excess cement on the floor tile. It is easier to apply grout only to the joints of a large-format tile whereas a small mosaic will require to be practically completely covered to fill out every one of the joints.
This is an extremely fine finish of cement and also is regular. Allow the cement established for a couple of hrs, and afterwards use a recommended cement haze remover and a dry or nearly dry sponge or cloth. Come at the cement line at an angled to avoid removing cement from the joint.

Tile Installer for Dummies

Actions on Just How to Lay Tile 1. Tiling a Flooring Overview Pursue a layout that makes the most of the number of entire ceramic tiles and the size of any cut tiles. When awkwardly sized floor tiles can't be prevented, place them where vanities will certainly cover them later on or out of the primary view lines from the doorway.
Save all of the cuts requiring a wetsaw for last. Rent out the wetsaw for read here one day. 2. Dry design Discover the omphalos of each wall surface and snap chalk lines on the floor. The line going across at the area's center are the starting point of the ceramic tile. Lay a row of tiles along a straightedge greater than halfway throughout the room.
Rumored Buzz on Tile Installation Contractors
This row determines the dimension of cut tiles along the wall surfaces. At the area's center, place a tile where the chalk lines go across with its edges touching the lines. Procedure from one wall surface (refer to it as A) to the nearest ceramic tile side. Currently, go to the floor tile row and, beginning at a joint, step along the row and mark the range you just measured.
If that dimension is much less than 2 inches, return to the center floor tile and relocate it far from wall surface A to develop a broader cut tile. 3. Dry design, Part II From the center floor tile, step to the contrary wall surface (call it B; mark this range along the floor tile row.
After adjusting the A-to-B line, note the center tile where it touches the chalk line in between the other walls (call them C and also D). Align these marks with the C-to-D chalk line. Repeat the measuring as well as adjusting process for wall surfaces C and D. Lay a straightedge alongside the C-to-D line as well as versus one side of the facility ceramic tile.
The Main Principles Of Tile Contractor
Mix just as much thinset as you can use in 2 hrs. With the flat edge of a trowel, spread a thin layer of thinset (scrape coat) over a 2-by-3-foot area next to the straightedge. Prior to the scratch coat dries out, use more thinset utilizing the notched side of the trowel.
Brushing the thinset into furrows allows air to escape as the ceramic tile is established. Set the ceramic tile Delicately lay a ceramic tile on thinset next to the straightedge.
Utilize this very same technique to set each ceramic tile, making one row along the straightedge. Using ceramic tile spacers makes certain also joints.
Rumored Buzz on Tile Contractors
For straight cuts with waste less than an inch wide, rating floor tile on snap cutter, after that break pieces off with nibblers or utilize a damp weblink saw. To fit this article a floor tile around an outside corner, hold one side against the wall surface as well as mark the ceramic tile where it touches the edge. Pencil a line right across the tile.
For rounded or scribed cuts, make parallel pieces with the damp saw right into the waste section, up to however not past the line marking the cut. Load the ceramic tile joints with cement After ceramic tile collections overnight, use a margin trowel to scrape off any thinset from the tile surface or in the joints.
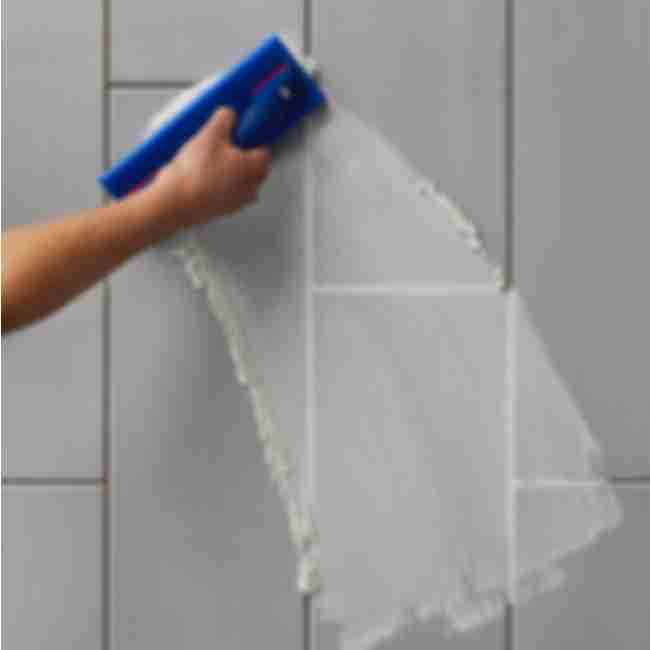
9. Cleansing up the cement Enable the cement to establish for 20 or 30 minutes. It needs to be strong to the touch before you start washing the tile's surface. Clean away grout haze with a damp, well-squeezed sponge rinsed often in a pail of tidy water. Again, wait for cement to haze over, after that clean with clean sponge.
3 Simple Techniques For Tile Contractors
Thinset mortar is the cement or bonding representative that affixes tile to the floor. Making use of a thinset mortar mixer, blend with the ideal amount of water in a big pail. Allow mean 5 to ten mins after blending to set. This "slake time" allows chemicals in the thinset mortar to fully turn on.
Porcelain floor tiles should constantly be used utilizing a customized thinset mortar to attain the proper bond - tile contractors. When mounting ceramic tile to a timber subfloor, mist or lightly sponge the subfloor with water prior to spreading out the thinset mortar.
Take care to mix tiny sets of thinset mortar so that it doesn't solidify prior to you have actually had a possibility to utilize it all. Do not add water after the thinset mortar begins to harden. This will damage the bond.